After months of work, we're happy to announce Lumo Play 4.1!
This update features tons of changes and improvements to the software. We've done our best to keep everything working the same as it always has, but a few things may look and feel a little different than before.
Let's just dive into the new features.
Subscriptions
One of the biggest changes to Lumo Play 4.1 is the introduction of subscription-based licenses. We currently offer two subscription tiers: Playground and Playmaker. You can read more about these tiers here.
The old Personal and Pro license tiers are still usable, so if you've bought a lot of games over the years you don't need to change over to a subscription right away. But you may want to anyway, since both subscription tiers offer access to our complete catalogue of games. And if that's still not enough content, you can upgrade to Playmaker and create unlimited Motion Maker games!
No More 30-Day Demo
With Lumo Play 4.1 we're finally retiring our old 30-day demo tier. Instead we have a brand-new Free license tier, available to everyone. This level never expires, and gives you access to a small selection of games that will rotate every month. If you want to try out Lumo Play, or only need to use it on rare occasions, this may be the best option for you!
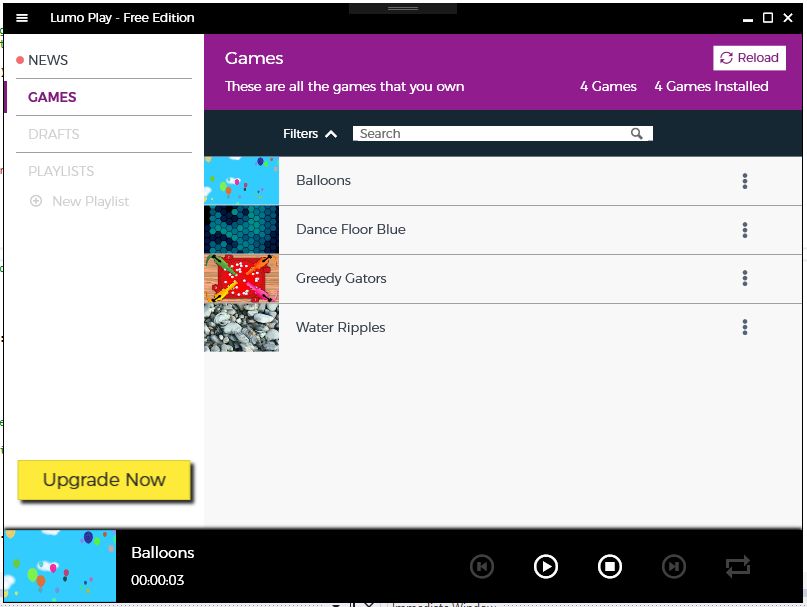
The Free edition gives you permanent access to a rotating collection of free games
Customers who have previously installed the old 30-day demo or are currently using it will be automatically upgraded to the new Free tier.
Add or Deactivate Licenses During Setup
If you've recently had a drive failure, or uninstalled Lumo Play without remembering to deactivate it first, we've got a big quality-of-life improvement for you; during setup you'll be able to reset one of your registered installations to free up a license, or you can add additional subscriptions to your account seamlessly. New subscriptions will be charged a prorated amount based on the time left before your next billing cycle starts.
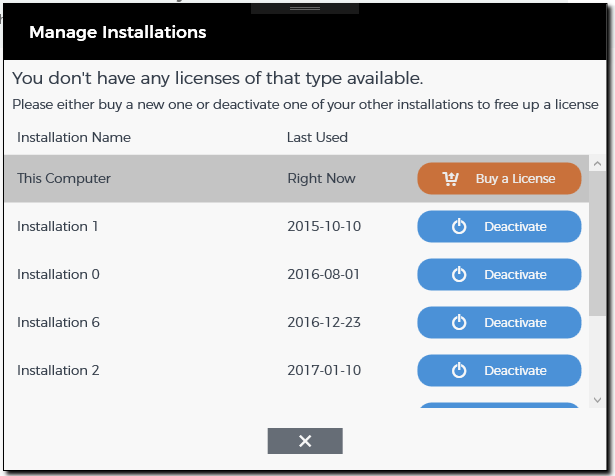
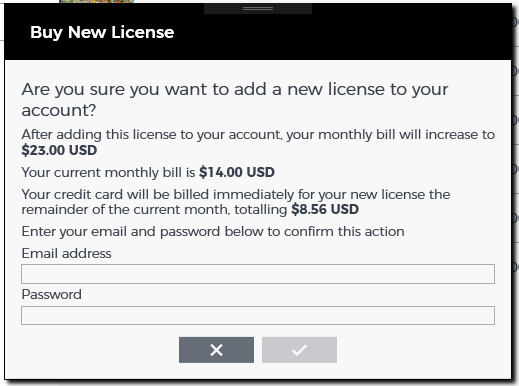
You can add an additional subscription license automatically during setup
Prices subject to change from what is displayed
Improved RealSense D400 Series Support
Intel's D415, D435, and D435i cameras are great, but our support for them was lacking some key features. Starting with Lumo Play 4.1 you can use multiple RealSense D400-series cameras to create seamed camera setups to cover even wider areas. Previously this was only available with the Orbbec Astra cameras. With this update you can even use RealSense and Astra cameras together, in case you have both on-hand. To take advantage of this feature, check out our article on using multiple cameras.
We're also re-enabling the Advanced RealSense Settings window, available from the F2 menu. This window gives you access to low-level settings to configure your D400-series camera, including adjusting the exposure and laser intensity settings. This will help users fine-tune their setup for maximum precision and performance.
The advanced RealSense Settings window gives you the ability to fine-tune your D415, D435 or D435i camera
Cosmetic Updates
In Lumo Play's preferences screen you'll see we've added support for light and dark color themes. These new options let you customize Lumo Play's appearance to better suit your needs. Don't want bright white screens washing out your projections? Change to the dark theme! You can change back and forth anytime you want.
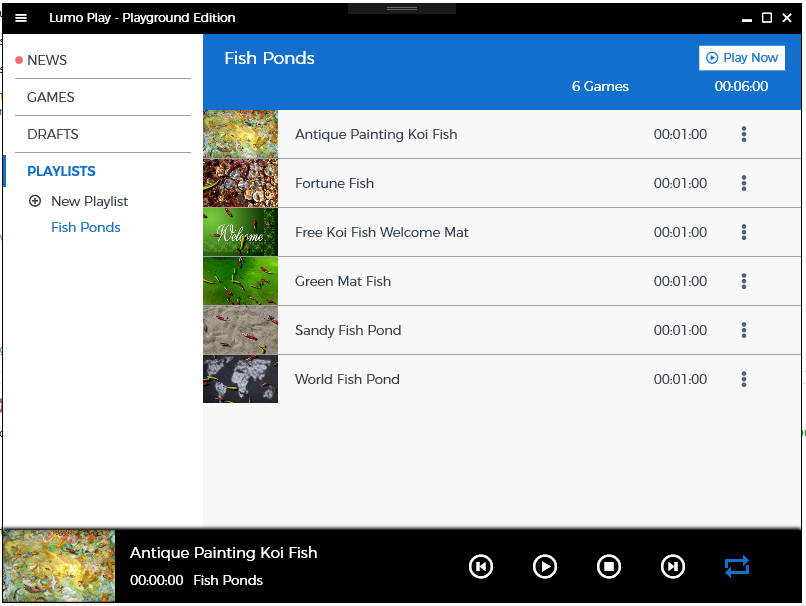
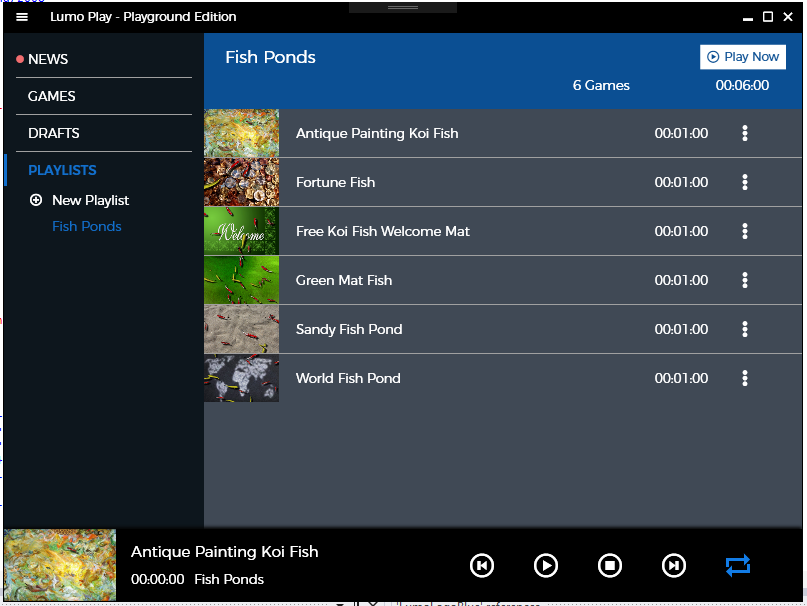
The Playground subscription tier with its light and dark themes
We've also made some changes to the Personal license tier. No longer do our Personal users need to stare at a wall of bright pink! We've toned everything down. The old "Personal Pink" is still there, but we think the new design is a lot easier on the eyes.
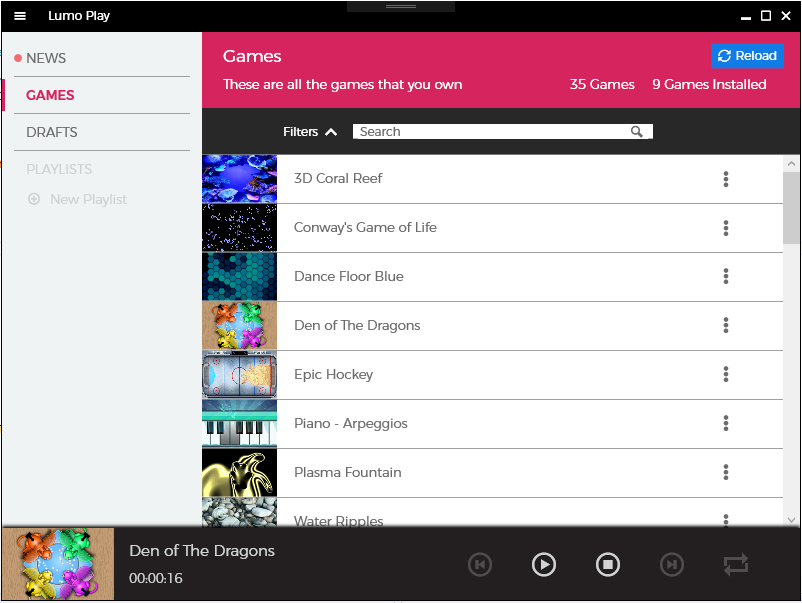
The new Personal theme reduces the amount of bright pink
We've added some new accessibility features to help make the software easier to use for people with visual impairments or who have lower-quality projectors. Enabling accessibility mode will increase the contrast throughout the application, making text stand out a little bit better from the background.
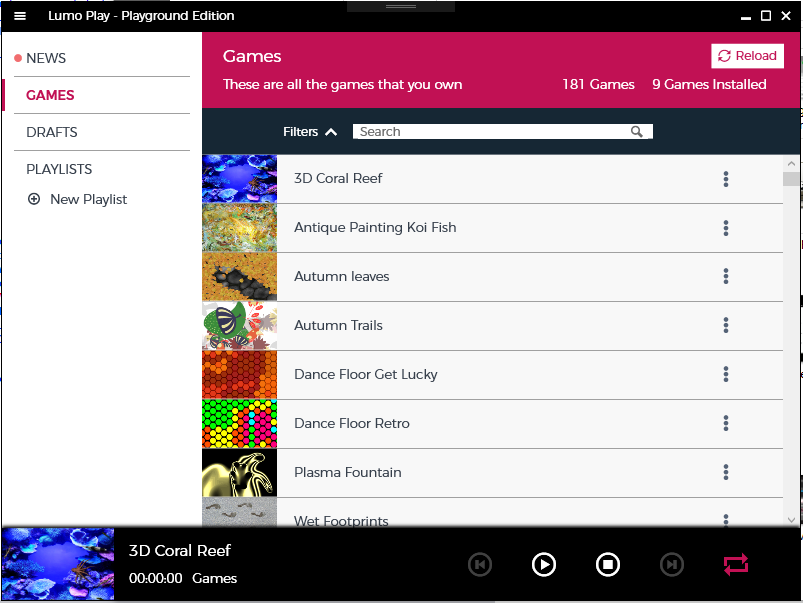
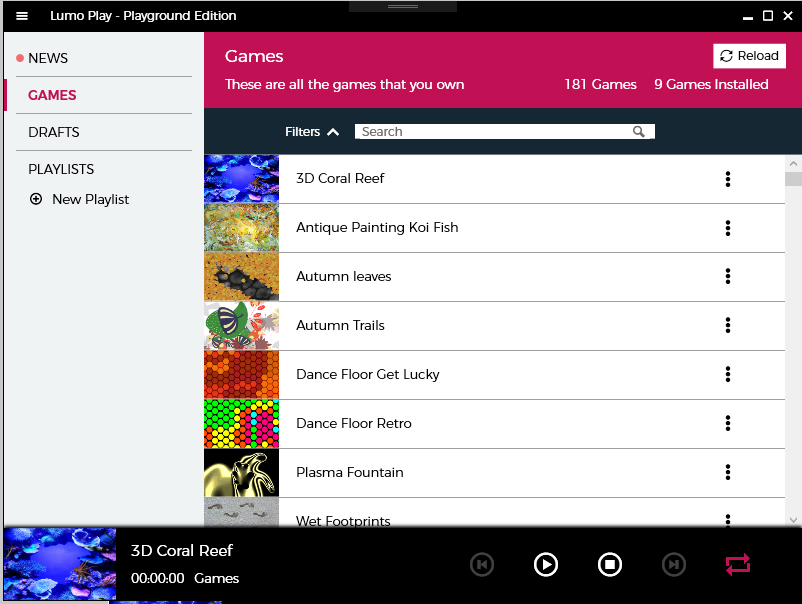
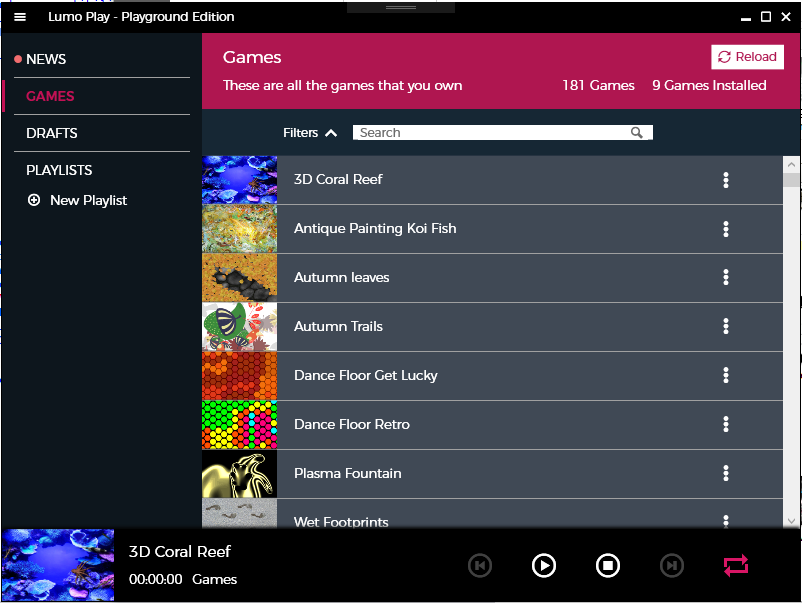
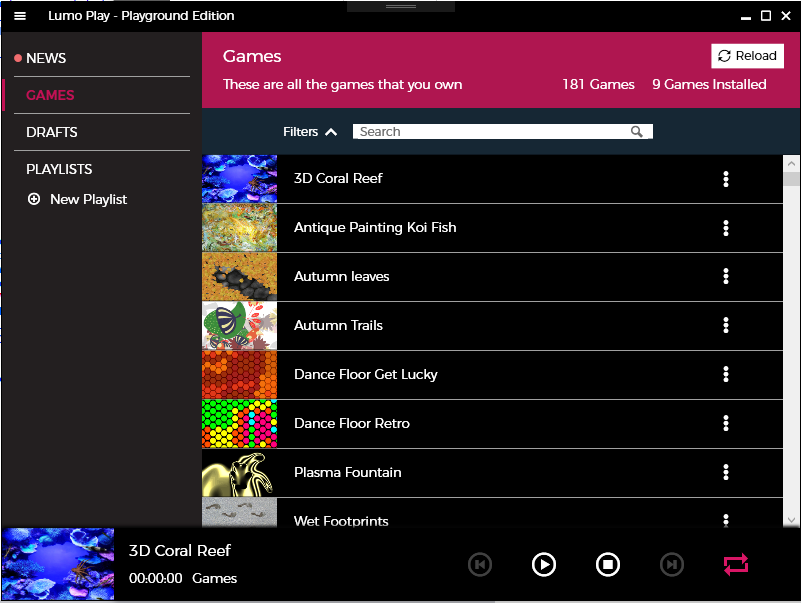
Top: Playground in light and light/accessible modes
Bottom: Playground in dark and dark/accessible modes
To enable accessibility mode, open the Preferences menu. Under the General tab there is a new entry for "Enable accessibility (high-contrast) mode:"

The new general settings in Lumo Play 4.1, including color and accessibility options
Finally, we've added a new option to enable text input instead of sliders when fine-tuning your calibration. This is available both in the "Calibrate" step of the wizard as well as the F2 menu:
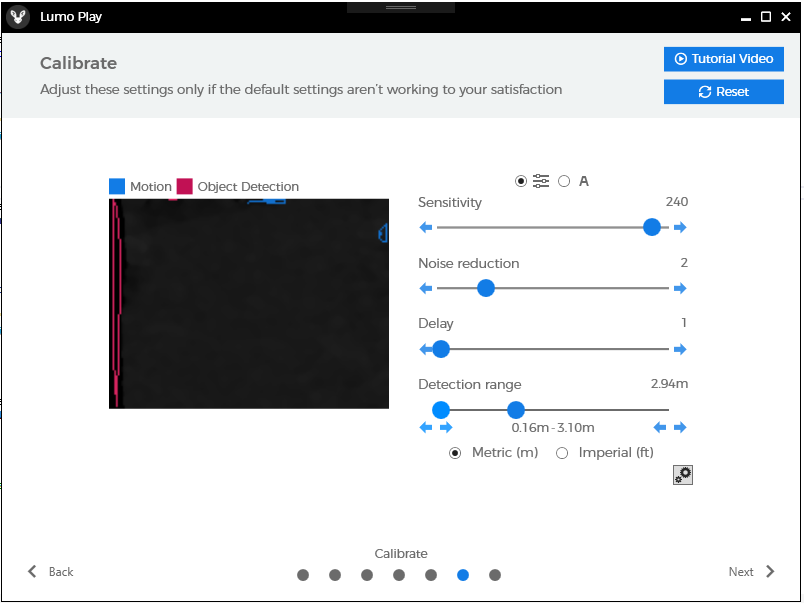
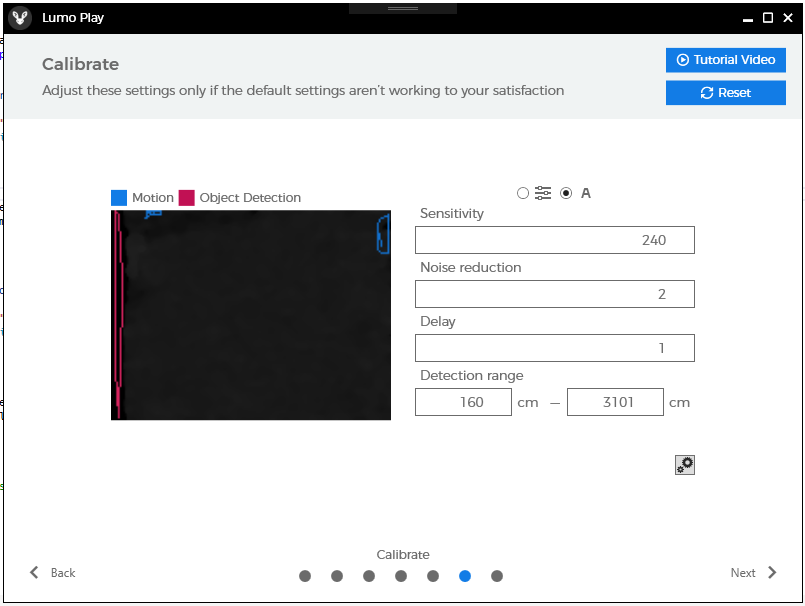
Above sliders is a new toggle to change between sliders or text input
The default option will still be sliders but for those attempting to calibrate a remote system using RDP or TeamViewer, or users who have difficulty using a mouse, you may find changing to text input easier.
Performance Improvements
In addition to the visible changes and new subscription license tiers, we've made several invisible, under-the-hood changes to help improve Lumo Play's performance.
With the addition of subscription licenses, the odds of a user having dozens, even hundreds of games in their library has gone way up. We've modified the library's search and category filters to make them faster and more responsive with larger libraries.
We've optimized a lot of the code that fetches game thumbnails. This means the user interface won't lock up anymore when loading large libraries the first time, and thumbnails should download faster than before.
Wall Ball Changes
Calibrating Lumo Play to be as accurate as possible can be especially difficult for Wall Ball setups; a minor misalignment of the camera can mean that balls thrown at one edge of the projection will be detected, while ones on the other edge won't be.
In older versions of Lumo Play we exposed sliders beside and below the camera's live view during the second-last step of calibration. While this worked, it also created some sensory overload issues with the sheer number of sliders presented to the user all at once.
Therefore, in Lumo Play 4.1 we've moved the camera alignment process to its own step during calibration. Currently this step is only present for Wall Ball setups, but in future we may expose it for other setups as well.
Just after the Mask Projection step when calibrating for Wall Ball, you will now see a new Camera Alignment step. This new step has 3 controls users should be aware of: the sliders to the right and below the camera's live view, and the Auto-Calibrate button in the upper-right corner.
Using the sliders will make small manual corrections for the camera's alignment relative to the wall. Alternatively, you can use the Auto-Calibrate button to automatically detect the camera's alignment and compensate for it. Make sure your equipment is securely installed and will not move before completing this step of calibration.
1) The camera is misaligned compared to the wall. Note how the bottom of the wall appears black, indicating it is far away, while the top is white, indicating that it is close.
2) Using the sliders to manually correct for the camera's alignment. Note that the wall appears flatter, but there are still some areas that are lighter/darker than others
3) Using the Auto-Calibrate button to automatically correct for the camera's alignment. Note how the wall appears a smooth, uniform shade of grey
If you are using a floor setup and find that the camera is detecting one edge of the floor better than the other, you can access the alignment sliders and auto-calibrate buttons by pressing F2.
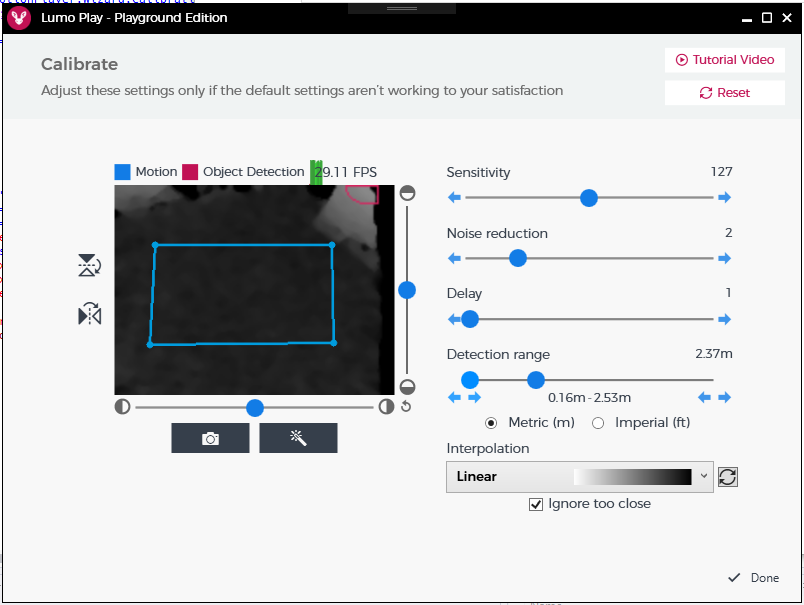
The updated F2 menu. This is an advanced feature that exposes many calibration settings all at once. Note the alignment sliders beside and below the live stream from the camera, as well as the magic-wand auto-calibrate button below.
Motion Maker Changes
Fans of our Motion Maker templates who use Personal licenses will be pleased to hear that they now have the ability to preview drafts. This will let those users download a preview copy of their games and run it inside Lumo Play, giving you a better idea of what the final versions of their games will look like.
You can find your Motion Maker drafts by clicking on the "Drafts" item on the left-hand menu. Previously this option was disabled for Personal license users, but starting with 4.1 it will be available for all paid licenses.*
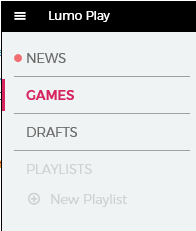
Personal users may now access their Motion Maker drafts from the menu
We have big plans for the future of Motion Maker. In a future update we'll be moving all of our Motion Maker tools directly into Lumo Play. This means you'll be able to edit your drafts in real-time; no more editing them in the browser and then downloading the changes. We can't give an exact estimate for when this will get rolled out, but we're hoping for fall 2019!
New Experimental Feature: NDI Support
In response to several clients, we have added experimental NDI support to Lumo Play. This will allow you to use additional sensors, such as capacitive floor tiles, in addition to depth cameras and webcams.
To enable NDI supprt, go to Preferences > Advanced, and toggle "Enable NDI Sources." Once enabled, NDI sources detected on the local network will be listed under the available cameras.
A few caveats about this feature:
1) NDI support is currently experimental. While we hope to take it out of beta soon, there may still be bugs to iron out right now. If you encounter any issues when using NDI sources with Lumo Play, please submit a bug report so that we can address the problem as quickly as possible.
2) NDI support is currently limited to sources either running on the local machine, or available on the same subnet as the local machine by default. Adding sources via a remote IP address on a different subnet is possible but still highly experimental. To enable adding NDI streams from external networks, copy the "NdiSources.txt" file from Lumo Play's installation directory into C:\ProgramData\Project_Prism\MotionPlayer, and add the IP addresses of the remote hosts whose NDI sources you wish to consume.
Over the coming weeks we will continue refining NDI support, and hope to make it an official, non-beta feature soon!
New Device Support
Microsoft's successor to the Kinect for Xbox One, the Azure Kinect is currently available as a developer kit. We've been working hard on getting this new device working with Lumo Play, and are happy to say that preliminary support for this camera is now available.
Because Microsoft's SDKs for the camera are still in-development, we've flagged this device as "Beta" inside the software. If you own an Azure Kinect, please feel free to use it as give us feedback on the camera's performance!
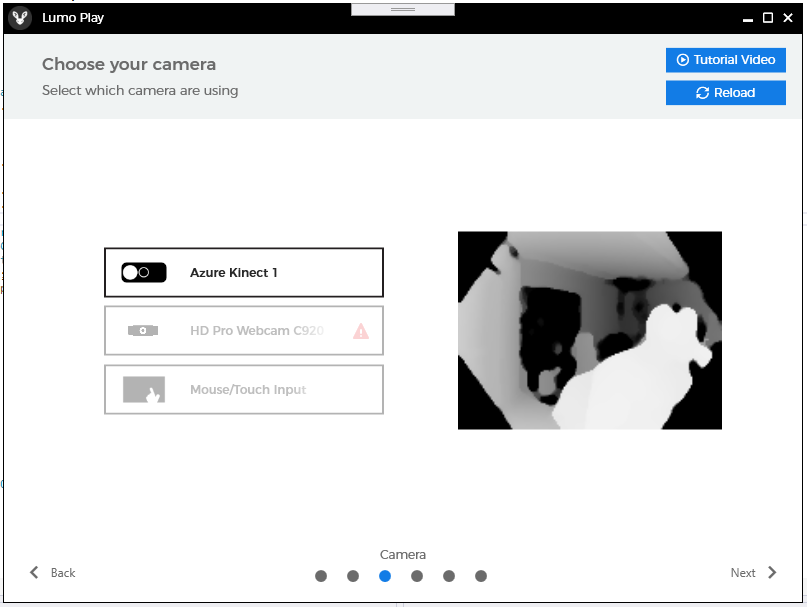
The Azure Kinect now has beta-support in Lumo Play
As support for the Azure Kinect matures we plan on dropping the Beta label and officially supporting this new camera.
__________________________________________________
*Paid licenses include: Personal and Pro, as well as Playground and Playmaker subscription holders, white-label resellers, and our unbranded Reseller Preview version.